엑셀 파일 읽기는 아래의 게시글 참고
2024.01.08 - [Spring Boot] - [Spring Boot] 스프링으로 엑셀 파일 읽기
[Spring Boot] 스프링으로 엑셀 파일 읽기
1. build.gradle plugins { id 'java' id 'org.springframework.boot' version '3.1.5' id 'io.spring.dependency-management' version '1.1.3' } group = 'practice' version = '0.0.1-SNAPSHOT' java { sourceCompatibility = '21' } configurations { compileOnly { extend
blogan99.tistory.com
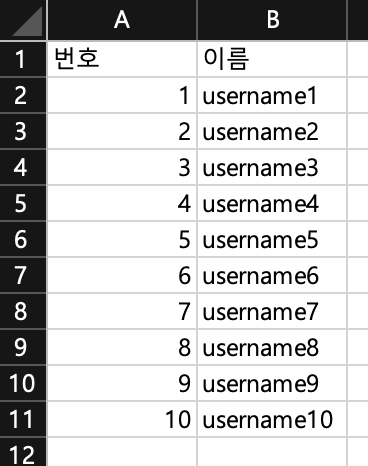
0. 예제 상황 가정
- 0행 0열 : "번호" , 0행 1열 : "이름"
- 해당 열의 내용에 맞는 데이터가 1행부터 나열됨

1. build.gradle
dependencies {

    // https://mvnrepository.com/artifact/org.apache.poi/poi
	implementation group: 'org.apache.poi', name: 'poi', version: '4.1.2'
	implementation group: 'org.apache.poi', name: 'poi-ooxml', version: '4.1.2'
	// https://mvnrepository.com/artifact/org.apache.tika/tika-core
	implementation group: 'org.apache.tika', name: 'tika-core', version: '2.3.0'

}
2. UploadExcel.java
import org.apache.poi.ss.usermodel.DataFormatter;
import org.apache.poi.xssf.usermodel.XSSFRow;
import org.apache.poi.xssf.usermodel.XSSFSheet;
import org.apache.poi.xssf.usermodel.XSSFWorkbook;
import org.springframework.web.multipart.MultipartFile;

import java.io.IOException;
import java.util.HashMap;
import java.util.Map;

public class UploadExcel {
    public static Map<String, String> uploadExcel(MultipartFile file) throws IOException {

        // Map : id와 이름을 key, value 형태로 저장
        Map<String, String> student = new HashMap<>();

        XSSFWorkbook workbook = new XSSFWorkbook(file.getInputStream());

        // 엑셀 파일의 0번째 시트
        XSSFSheet sheet = workbook.getSheetAt(0);

        for (int i = 1; i < sheet.getPhysicalNumberOfRows(); i++) {
            XSSFRow row = sheet.getRow(i);
            DataFormatter formatter = new DataFormatter();

            // id : 0번째 열
            String id = formatter.formatCellValue(row.getCell(0));
            // name : 1번째 열
            String name = formatter.formatCellValue(row.getCell(1));

            student.put(id, name);

        }

        // 학생 정보를 담은 Map 객체 리턴
        return student;
    }
}
3. Controller.java
@Controller
public class Controller {

    @GetMapping("")
    public String home(Model model) {

        model.addAttribute("students", new HashMap<>());

        return "upload";
    }

    @PostMapping("")
    public String upload(@RequestParam("excelFile")MultipartFile file, Model model) throws IOException {

        Map<String, String> studentInfo = UploadExcel.uploadExcel(file);

        model.addAttribute("students", studentInfo);
        return "upload";
    }
}
4. upload.html
<!DOCTYPE HTML>
<html xmlns:th="http://www.thymeleaf.org">
<html>
<head>
<title>
엑셀 파일 업로드
</title>
</head>
<body>
<h2>엑셀 파일 업로드 예제</h2>
<form action="" method="POST" enctype="multipart/form-data">
<input type="file" name="excelFile">
<input type="submit" value="업로드">
</form>
<table class="table active-table-tab">
<thead>
<tr>
<th>번호</th>
<th>이름</th>
</tr>
</thead>
<tbody>
<tr th:each="student : ${students}">
<td th:text="${student.getKey()}"></td>
<td th:text="${student.getValue()}"></td>
</tr>
</tbody>
</table>
</body>
</html>
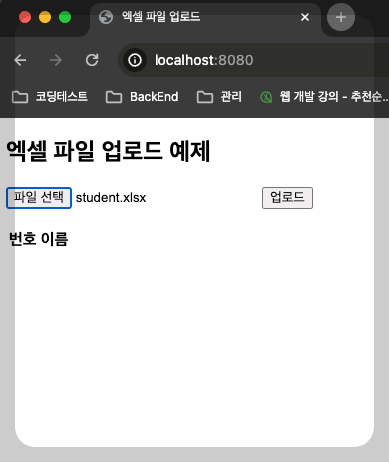
5. 실행 결과
- 업로드 이전

- 업로드 이후

- 업로드된 엑셀 파일을 성공적으로 읽어서 데이터를 출력함을 확인!
'Spring Boot' 카테고리의 다른 글
| [Spring Boot] Whitelabel Error Page 대신 원하는 에러 페이지 적용 (0) | 2024.04.04 |
|---|---|
| [Spring Boot] 스프링 메일 전송 방법 ( + google Gmail SMTP 설정) (0) | 2024.03.28 |
| [Spring Boot] 스프링 부트 엑셀 파일에 데이터 쓰기 (0) | 2024.03.27 |
| [AWS] EC2 서버 시간 설정 (TimeZone 변경) (0) | 2024.03.26 |
| [Spring Boot] 원하는 시간에 특정 코드 자동 실행시키기 (@Scheduled) (0) | 2024.03.26 |
