1. Geocoder API 2.0
- open weather map 의 현재 날씨 정보 API를 사용하기 위해서는 요청에 위도, 경도를 포함해야 함
- 내 주소 (혹은 날씨를 알고 싶어하는 주소)의 위도, 경도를 알기 위해 사용함
1-1. Geocoder API 사용 방법
1-1-1. 회원가입
https://www.vworld.kr/v4po_main.do
브이월드
국가가 보유하고 있는 공개 가능한 공간정보를 모든 국민이 자유롭게 활용할 수 있도록 다양한 방법을 제공합니다.
www.vworld.kr
해당 사이트에 접속 후 회원가입 진행
1-1-2. api 인증키 발급
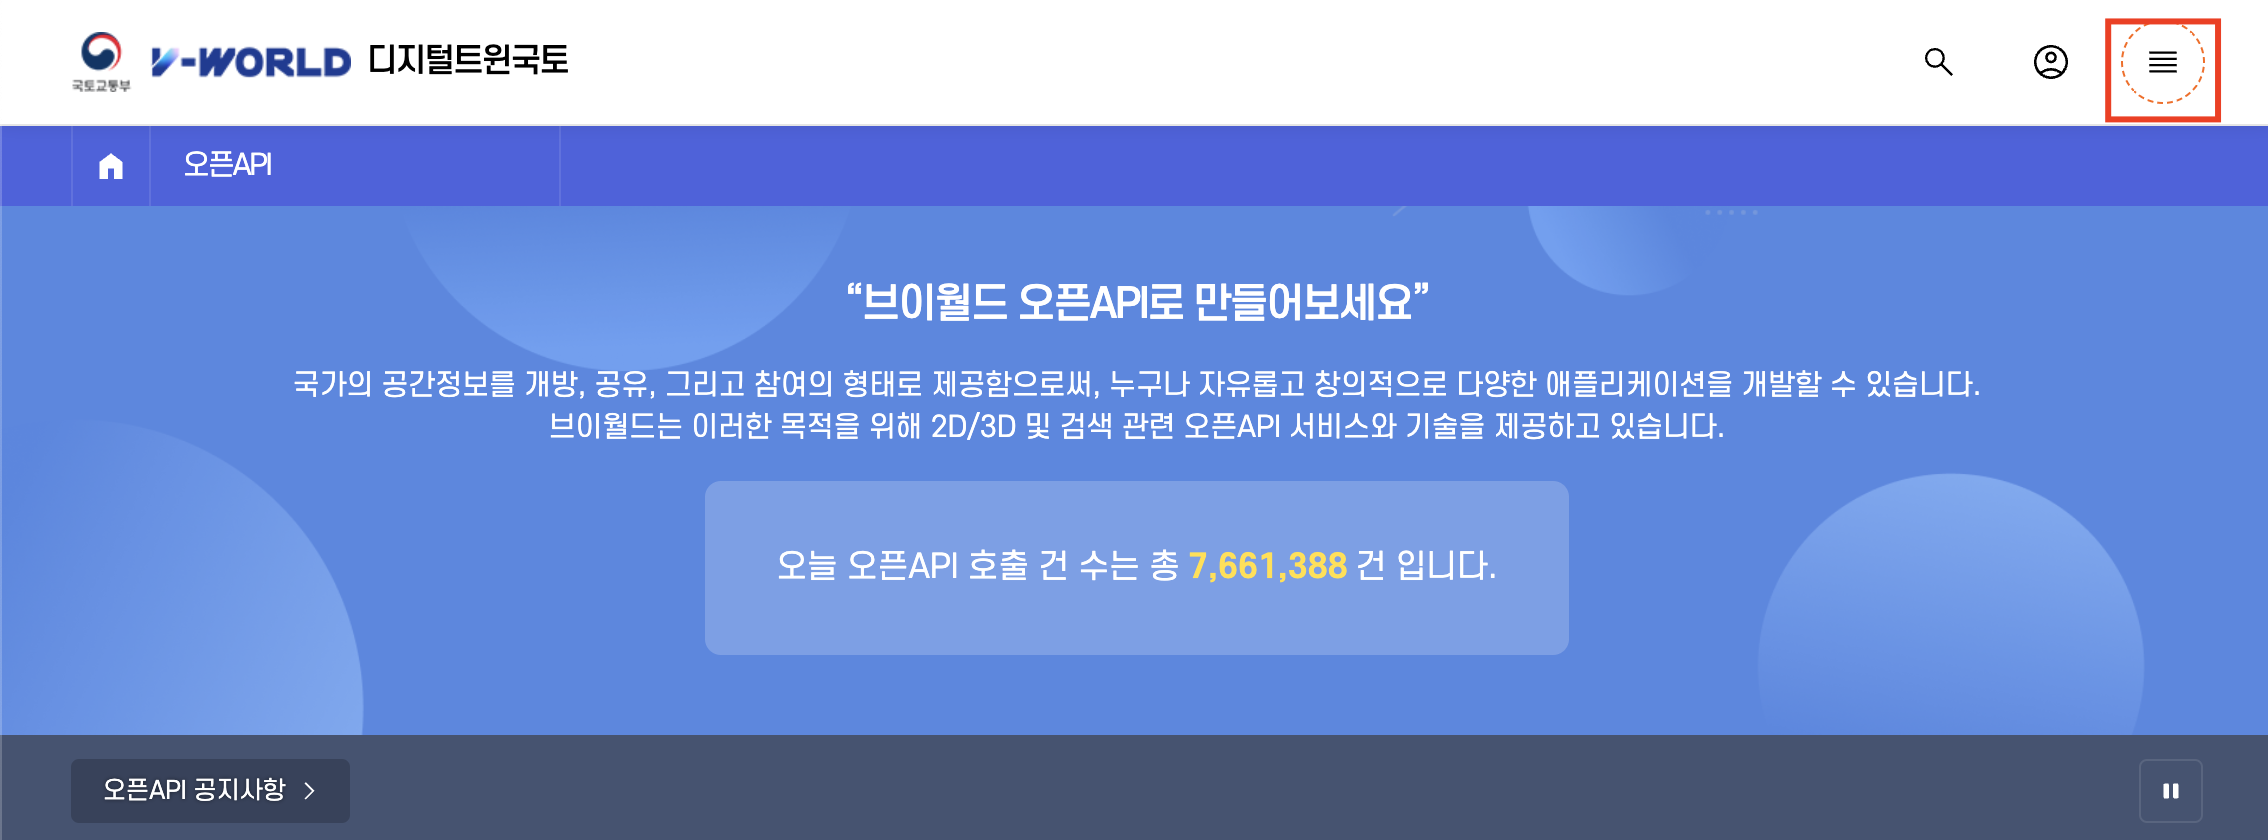
- 상단의 메뉴바 클릭
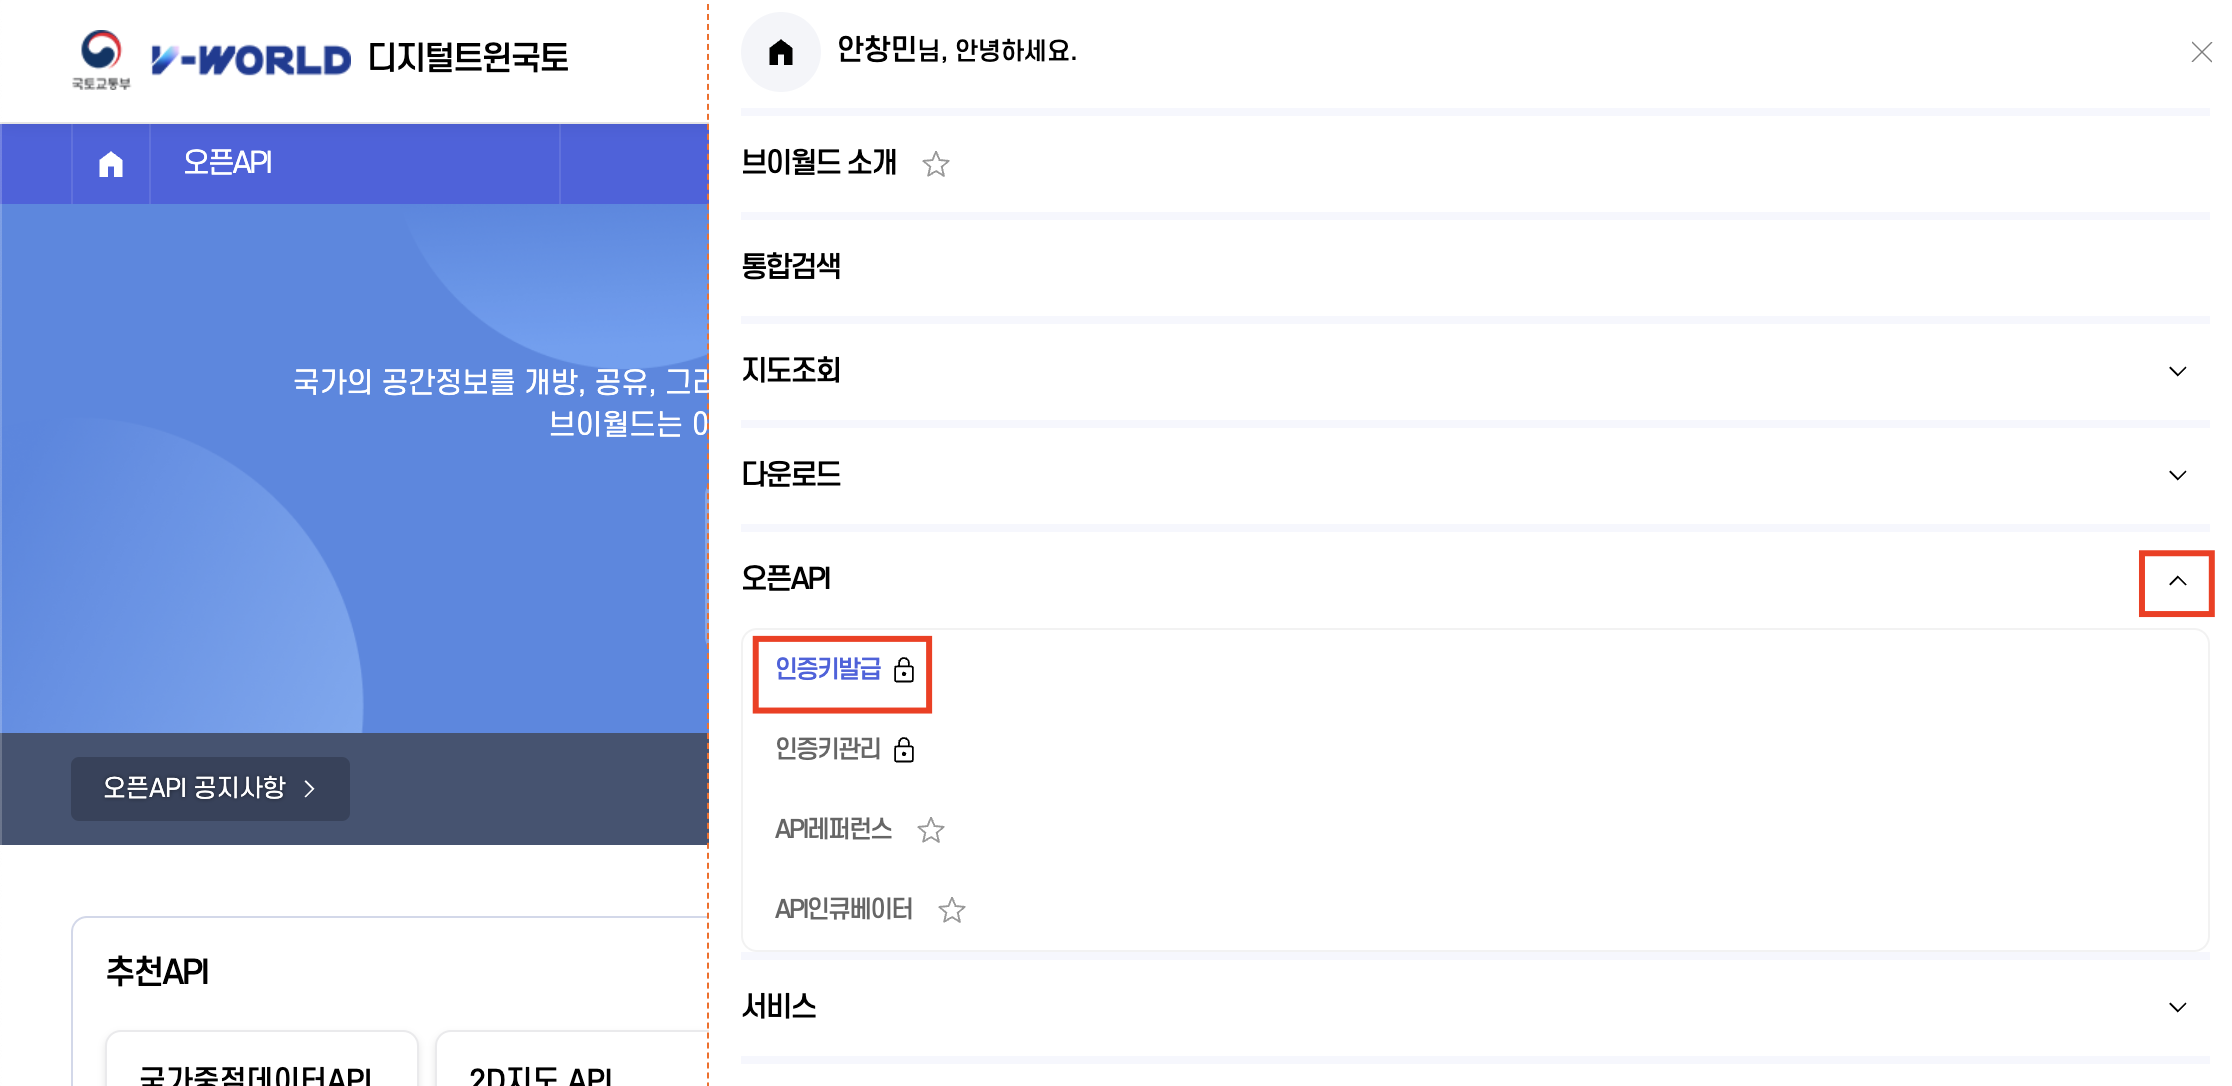
- 오픈 API > 인증키발급 클릭
- 약관 동의 후 이용 정보 작성 (아래는 예시)
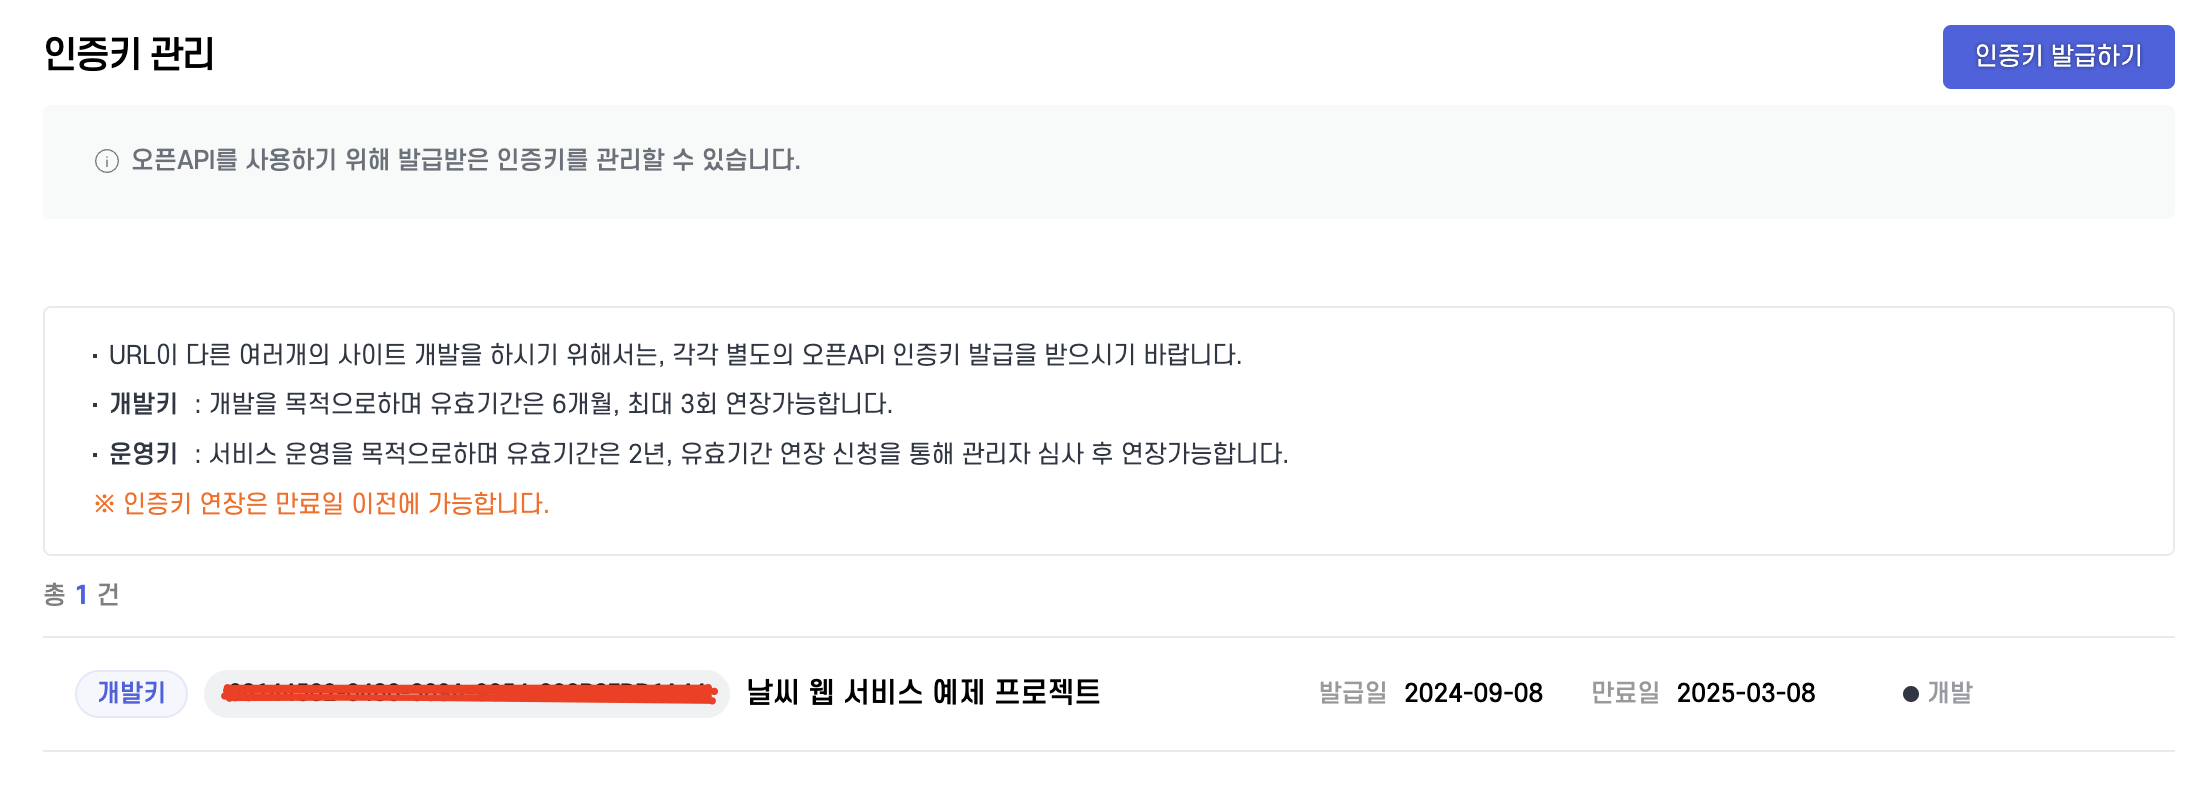
- 서비스명 : 날씨 웹 서비스 예제 프로젝트
- 서비스 분류 : 교육
- 서비스 유형 : 웹사이트
- 서비스 URL : localhost:8080
- 서비스 설명
- 개요 : 날씨 웹 서비스 예제 프로젝트
- 서비스 대상 : 로컬(개인)
- 목적 : open weather map API와 연동하여 주소 입력을 통한 날씨 정보 가져오는 프로젝트
- 활용 API : 지오코더 API (반드시 선택!)
- 사용기관 : 민간, 개인
- 인증키 발급 확인
1-2. postman으로 api 호출 확인
- https://www.vworld.kr/dev/v4dv_geocoderguide2_s001.do
- 위의 사이트에서 요청 URL을 참고
https://api.vworld.kr/req/address?service=address&request=getCoord&key=[발급받은 인증키]&type=ROAD&address=[위치정보를 원하는 주소]- 요청 파라미터
- service=address (필수)
- request=getCoord (필수)
- key=[발급받은 인증키] (필수)
- type : 검색 주소 유형 (필수)
- type=PARCEL : 지번주소로 검색
- type=ROAD : 도로명주소로 검색 (여기서는 도로명 주소로 검색함)
- address (필수)
- 위치 정보를 원하는 주소 기입
- (여기서는 도로명주소로 선택 후 대략적인 도로명 주소만 기입해도 가능함)
- refine=true (기본값)으로 설정되어 있기 때문
- 대략적인 도로명 주소도 정제되어 완벽한 주소로 변환함!
- ex) 인하대학교 → 인천광역시 미추홀구 인하로 100 (용현동) 으로 정제됨!

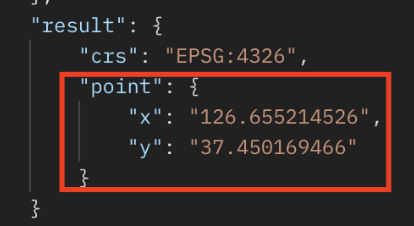
원하던 위도, 경도 정보를 반환받음을 확인!
2. open weather map 날씨 API
- https://openweathermap.org/api
- 위의 사이트에서 제공하는 api로 위치 정보 입력하면 날씨 정보를 반환받을 수 있음
2-1. open weather map API 사용 방법
2-1-1. 회원가입
https://home.openweathermap.org/users/sign_in
Members
Enter your email address and we will send you a link to reset your password.
home.openweathermap.org
2-1-2. API 키 발급
- (https://openweathermap.org/api) Subscribe 버튼 클릭

- 아래의 Free 플랜의 Get API key 클릭

- 발급받은 API 키 확인

2-2. postman으로 api 호출 확인
- https://openweathermap.org/current
- 위의 사이트에서 요청 URL 참고

https://api.openweathermap.org/data/2.5/weather?lat=37.450169466&lon=126.655214526&appid=[발급받은 API키]- 위도(lat) : 위에서 확인한 위치정보의 y 값
- 경도(lon) : 위에서 확인한 위치정보의 x 값
- api 응답 결과
{
    "coord": {
        "lon": 126.6552,
        "lat": 37.4502
    },
    "weather": [
        {
            "id": 800,
            "main": "Clear",
            "description": "clear sky",
            "icon": "01d"
        }
    ],
    "base": "stations",
    "main": {
        "temp": 300.06,
        "feels_like": 301.78,
        "temp_min": 300.06,
        "temp_max": 300.06,
        "pressure": 1013,
        "humidity": 69,
        "sea_level": 1013,
        "grnd_level": 1010
    },
    "visibility": 10000,
    "wind": {
        "speed": 3.09,
        "deg": 300
    },
    "clouds": {
        "all": 0
    },
    "dt": 1725786472,
    "sys": {
        "type": 1,
        "id": 8093,
        "country": "KR",
        "sunrise": 1725743378,
        "sunset": 1725789174
    },
    "timezone": 32400,
    "id": 1843564,
    "name": "Incheon",
    "cod": 200
}날씨, 기온, 체감온도, 기압, 습도, 최고 최저 기온, 풍속 등 다양한 날씨 정보를 응답 받음을 확인!
3. 예제 프로젝트
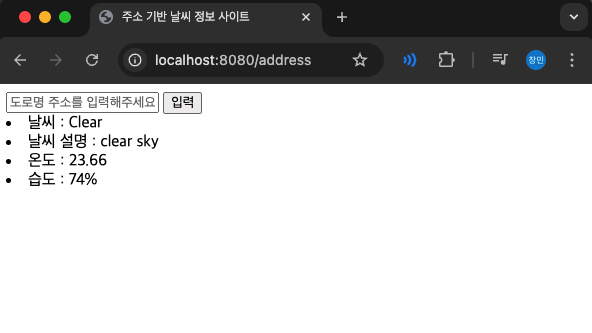
- 간단한 예제 프로젝트로 간략한 도로명 주소 입력 시 날씨 정보 반환
- 컨트롤러, 서비스, html (뷰) 만 구현
- DB 접근이나 레파지토리 사용 등은 x
- 반환하는 정보
- 날씨
- 날씨 설명
- 온도 (섭씨)
- 습도
3-1. 의존 라이브러리
- build.gradle
dependencies {
    implementation 'org.springframework.boot:spring-boot-starter-thymeleaf'
    implementation 'org.springframework.boot:spring-boot-starter-web'
    compileOnly 'org.projectlombok:lombok'
    developmentOnly 'org.springframework.boot:spring-boot-devtools'
    annotationProcessor 'org.projectlombok:lombok'
    testImplementation 'org.springframework.boot:spring-boot-starter-test'
    testRuntimeOnly 'org.junit.platform:junit-platform-launcher'

    // JSON 데이터를 처리하기 위한 라이브러리 추가
    implementation group: 'org.json', name: 'json', version: '20231013'
}
3-2. service
- WeatherService
@Service
public class WeatherService {

    // 위도와 경도를 Map<String, String> 형태로 반환하는 메서드
    public Map<String, String> returnLanLon(String address) {
        Map<String, String> coordinates = new HashMap<>();
        String apiKey = ""; // 발급받은 인증키 작성할 것

        try {
            // 주소 인코딩 (인코딩 x 시 400에러 발생함)
            String encodedAddress = URLEncoder.encode(address, StandardCharsets.UTF_8.toString());
            String apiUrl = "https://api.vworld.kr/req/address?service=address&request=getCoord&key="
                    + apiKey + "&type=ROAD&address=" + encodedAddress;

            // URL 객체 생성
            URL url = new URL(apiUrl);
            // 연결 설정
            HttpURLConnection conn = (HttpURLConnection) url.openConnection();
            conn.setRequestMethod("GET");

            // 응답 코드 확인
            if (conn.getResponseCode() == HttpURLConnection.HTTP_OK) {
                BufferedReader in = new BufferedReader(new InputStreamReader(conn.getInputStream()));
                StringBuilder response = new StringBuilder();
                String inputLine;

                // 응답 내용 읽기
                while ((inputLine = in.readLine()) != null) {
                    response.append(inputLine);
                }
                in.close();

                // JSON 응답 파싱
                JSONObject jsonResponse = new JSONObject(response.toString());
                if (jsonResponse.getJSONObject("response").getString("status").equals("OK")) {
                    String x = jsonResponse.getJSONObject("response").getJSONObject("result").getJSONObject("point").getString("x");
                    String y = jsonResponse.getJSONObject("response").getJSONObject("result").getJSONObject("point").getString("y");
                    coordinates.put("lat", y);
                    coordinates.put("lon", x);
                }
            } else {
                System.out.println("Error: " + conn.getResponseCode());
            }
        } catch (Exception e) {
            e.printStackTrace();
        }

        return coordinates;
    }

	// 날씨 정보를 Map<String, String> 형태로 반환하는 메서드
    public Map<String, String> returnWeather(Map<String, String> lanLon) {
        String apiKey = ""; // 발급받은 API 키 작성할 것

        // 넘어온 위도, 경도를 포함한 url
        String apiUrl = "https://api.openweathermap.org/data/2.5/weather?lat="
                + lanLon.get("lat") + "&lon=" + lanLon.get("lon") + "&appid=" + apiKey;

        Map<String, String> weather = new HashMap<>();

        try {
            // URL 객체 생성
            URL url = new URL(apiUrl);
            // 연결 설정
            HttpURLConnection conn = (HttpURLConnection) url.openConnection();
            conn.setRequestMethod("GET");

            // 응답 코드 확인
            if (conn.getResponseCode() == HttpURLConnection.HTTP_OK) {
                BufferedReader in = new BufferedReader(new InputStreamReader(conn.getInputStream()));
                StringBuilder response = new StringBuilder();
                String inputLine;

                // 응답 내용 읽기
                while ((inputLine = in.readLine()) != null) {
                    response.append(inputLine);
                }
                in.close();

                // JSON 응답 파싱
                JSONObject jsonResponse = new JSONObject(response.toString());

                weather.put("weather_main", jsonResponse.getJSONArray("weather").getJSONObject(0).getString("main"));
                weather.put("weather_description", jsonResponse.getJSONArray("weather").getJSONObject(0).getString("description"));

                BigDecimal temp = jsonResponse.getJSONObject("main").getBigDecimal("temp");
                BigDecimal tempCelsius = BigDecimal.valueOf(temp.doubleValue() - 273.15).setScale(2, RoundingMode.HALF_UP); // 소수점 둘째 자리에서 반올림

                weather.put("temperature", String.valueOf(tempCelsius));

                int humidity = jsonResponse.getJSONObject("main").getInt("humidity");
                weather.put("humidity", Integer.toString(humidity) + "%");
            } else {
                System.out.println("Error: " + conn.getResponseCode());
            }
        } catch (Exception e) {
            e.printStackTrace();
        }

        return weather;
    }

}
3-3. controller
- WeatherController
@Controller
@RequiredArgsConstructor
public class WeatherController {

    private final WeatherService weatherService;

    @GetMapping
    public String home() {
        return "index";
    }

    @PostMapping("/address")
    public String showWeather(@RequestParam("address") String address, Model model)  {
        Map<String, String> lanLon = weatherService.returnLanLon(address);

        model.addAttribute("weather", weatherService.returnWeather(lanLon));
        return "index";
    }
}
3-4. html
- index.html
<!doctype html>
<html lang="ko">
<head>
    <meta charset="UTF-8">
    <meta name="viewport"
          content="width=device-width, user-scalable=no, initial-scale=1.0, maximum-scale=1.0, minimum-scale=1.0">
    <meta http-equiv="X-UA-Compatible" content="ie=edge">
    <title>주소 기반 날씨 정보 사이트</title>
</head>
<body>

<form th:action="@{/address}" method="post">
    <input name="address" placeholder="도로명 주소를 입력해주세요."/>

    <button type="submit">입력</button>
</form>

<div th:unless="${weather == null}">
    <li th:text="'날씨 : ' + ${weather['weather_main']}"></li>
    <li th:text="'날씨 설명 : ' + ${weather['weather_description']}"></li>
    <li th:text="'온도 : ' + ${weather['temperature']}"></li>
    <li th:text="'습도 : ' + ${weather['humidity']}"></li>


</div>
</body>
</html>
4. 실행 결과
- 첫 화면
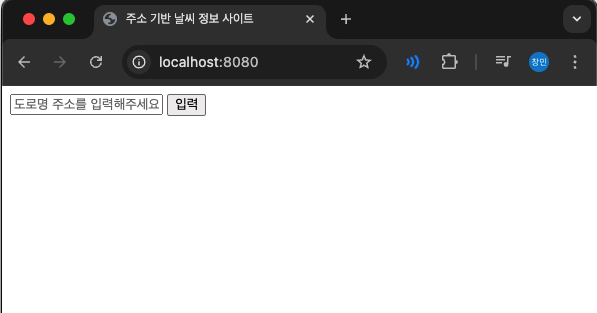
- 도로명 주소 입력1 (입력 : 인하대학교)

- 도로명 주소 입력2 (입력 : 대종로 480번 길)
'Spring Boot' 카테고리의 다른 글
| [Spring Boot] 스프링 로깅 방법 (SLF4J, Logback) (0) | 2024.09.15 |
|---|---|
| [Spring Boot] TDD와 given-when-then 패턴으로 테스트 코드 작성 (JUnit, AssertJ, 단위 테스트, 통합 테스트, Mock 등) (0) | 2024.09.11 |
| [Spring Boot] Jpa Auditing (+ BaseEntity) 로 엔티티 관련 이벤트 자동 기록하기 (2) | 2024.09.07 |
| [Spring Boot] JpaRepository 개념, 사용 방법 (쿼리 메서드, @Query, JPQL, Native Query) (0) | 2024.09.05 |
| [Spring Boot] ResponseEntity 사용 이유, 사용 방법 (1) | 2024.09.05 |
